
Creating JAMstack website with dynamic generated content from remote markdown files
In this article, we will guide you how you can take a use of open source ockam-webiste repository, and create Gatsby JAMstack website with Terraform, Azure Cloud and Azure Pipelines


Piotr Sobieszczański & Łukasz Miedziński
May 24, 2020 | 16 min read

What is it all about?
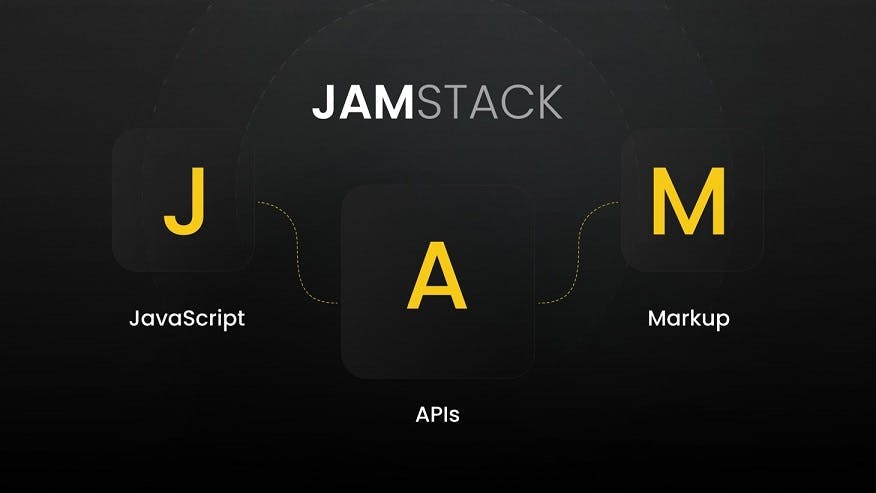
When you navigate to the official website of JAMstack, the first thing you’ll see is a description of its technology:
Fast and secure sites and apps delivered by pre-rendering files and serving them directly from a CDN, removing the requirement to manage or run web servers.
What does it mean? Well, in a nutshell, you just need to create by hand or compile code (Jekyll, Hugo or Gatsby to name a few) to HTML, CSS and JavaScript, then deploy it to your object storage and purge your CDN. The advantage is obvious. It’s faster, cheaper and easily scalable. This approach is true in many cases, but one we want to share with you, is how we use it to generate the Ockam website within documentation from related remote repositories.
The important thing that is worth mentioning, is that the JAMstack approach helps us to simplify the process of generating documentation from
1Markdown
In this article, I’ll show you how to:
Create JAMstack infrastructure with Terraform and Azure cloud, and similarly, how we did it for Ockam.
- Cover deployment process via continuous delivery pipeline with pipelines for Azure Pipelines.
- We’ll show you how to develop and customize the frontend for Ockam_webiste to fit your needs.
- Generate a documentation page on your website, directly from Markdown files from your remote repositories
In the second part of the articles, we will cover the frontend part and how to configure a project to fit your needs.
Requirements
You need to have an Azure account. You can create one here. Additionally
1terraform
1az
Infrastructure in Azure cloud
Infrastructure for JAMstack site is fairly simple, in our case it consists of Azure Storage, CDN and DNS zone.
Keep Terraform state remotely
Terraform works with a so called state which contains the information (state) of your infrastructure. If you do nothing, the state is managed on your local machine. This is good for local development or test purposes but if you want to have a production environment, then it’s always good to keep it in a safe place, just in case your hard drive fails or you want to work with your colleagues in the office. So, let’s start here and set up a Terraform remote state.
Before we use Azure CLI we need to log into it.
1az login
This will redirect you to the azure login page after which you will be able to run commands on your account.
First, we’ll create blob storage for state. To do so, you need to have a resource group. In essence, it's a container that holds related resources for an Azure solution. The below command will create a resource group resource_group_name. The location is obviously the region where you want to put your resource.
1az group create --name resource_group_name --location westeurope
When we have our group, we can start creating our resources. So let’s create storage for the Terraform state. We’ll use the resource group we created in the previous step. Name of the storage (which can contain only lowercase letters and numbers) and some custom tags. Those can be anything you want or nothing if you don’t want them at all. If you're interested, the rest of the parameters are described here.
1az storage account create2--resource-group resource_group_name3--name uniqueaccountname4--sku Standard_LRS5--encryption-services blob6--kind StorageV27--tags project=website type=terraform-state env=production;
After this command you should have a storage account in the cloud, but this is not the end. You need to create “space” inside your storage account to keep your state files, this is called a container. To do it, first we need to fetch the account key. This is a kind of token that will authorize us to create a container inside your storage account. How to get the storage account key:
1ACCOUNT_KEY=$(az storage account keys list --resource-group resource_group_name --account-name uniqueaccountname --query [0].value -o tsv)
Finally, create a container
1az storage container create --name containername --account-name uniqueaccountname --account-key $ACCOUNT_KEY
Now we can set up terraform to work with Azure. Create a directory where you want to keep your project and init repository. After all, Terraform is a solution for Infrastructure as Code, so you probably want to keep a repository to track changes.
Our first terraform file will be
1main.tf
1provider "azurerm" {2 # whilst the `version` attribute is optional, we recommend pinning to a given version of the Provider3 version = "=2.8.0"4 features {}5}67terraform {8 backend "azurerm" {9 resource_group_name = "resource_group_name"10 storage_account_name = "uniqueaccountname"11 container_name = "containername"12 key = "terraform.tfstateenv"13 }14}1516data "azurerm_resource_group" "main" {17 name = "resource_group_name"18}19
A
1provider
1terraform {}
In the tags section, you can see the Terraform variable convention tells you to keep them in the
1variables.tf
1variable "project" {2 type = string3 default = "uniqueprojectname"4}
We will add more variables later on.
Now, when you run the
1terraform plan
1resource_group_name
Storage for website static files
Let’s create actual storage for our website files. We will upload all the compiled assets there. You can create additional
1storages.tf
1main.tf
1 resource "azurerm_storage_account" "static_files" {2 name = "${var.project}2staticfile"3 resource_group_name = data.azurerm_resource_group.main.name4 location = data.azurerm_resource_group.main.location5 account_tier = "Standard"6 account_replication_type = "LRS"7 account_kind = "StorageV2"89 tags = {10 project = var.project11 }12 }1314 module "staticweb" {15 source = "StefanSchoof/static-website/azurerm"16 storage_account_name = azurerm_storage_account.static_files.name17 }1819 data "azurerm_storage_account" "static_files" {20 name = azurerm_storage_account.static_files.name21 resource_group_name = data.azurerm_resource_group.main.name2223 depends_on = [module.staticweb]24 }2526 output "static_web_url" {27 value = azurerm_storage_account.static_files.primary_web_endpoint28 }
Here, we can see we not only created a storage account for static files, but also turned on the website’s ability to store so it can serve files in the sameway as the web server. To do it, we need to use the Terraform
1module
1azurerm_storage_account
1StefanSchoof/static-website/azurerm
1az
The
1data
1primary_web_endpoint
Next, apply your changes into azure via terraform:
1$ terraform init2$ terraform plan --out=plan.tfplan3$ terraform apply "plan.tfplan"
Content Delivery Network
The last part of the infrastructure is a CDN. Azure has four different kinds of CDNs to choose from:
- Azure CDN Standard from Microsoft
- Azure CDN Standard from Akamai
- Azure CDN Standard from Verizon
- Azure CDN Premium from Verizon
In our case, we will pick Azure CDN Premium from Verizon, because it provides a powerful Rules Engine, which will help with redirections and caching actions mentioned above. Of course you are more than welcome to do research on your own and pick a different one that meets your requirements. Basically, if you are sure you don’t need any redirections then probably
1Standard from Microsoft
Now let’s create our third file
1cdn.tf
1resource "azurerm_cdn_profile" "cdn_verizon_premium" {2 name = "${var.project}-verizon-premium"3 location = var.location4 resource_group_name = azurerm_resource_group.main.name5 sku = "Premium_Verizon"67 tags = {8 project = var.project9 }1011 depends_on = [data.azurerm_storage_account.static_files]12}1314resource "azurerm_cdn_endpoint" "jamstack_website" {15 name = var.cdn_cache_endpoint16 profile_name = azurerm_cdn_profile.cdn_verizon_premium.name17 location = azurerm_resource_group.main.location18 resource_group_name = azurerm_resource_group.main.name19 origin_host_header = azurerm_storage_account.static_files.primary_web_host2021 origin {22 name = var.origin_name23 host_name = azurerm_storage_account.static_files.primary_web_host24 }2526 depends_on = [azurerm_cdn_profile.cdn_verizon_premium]27}
Also, add new variables to our
1variables.tf
12variable "location" {3 type = string4 default = "westeurope"5}67variable "cdn_cache_endpoint" {8 type = string9 default = "cdn-my-website"10}1112variable "origin_name" {13 type = string14 default = "my-website-origin"15}
The
1azurerm_cdn_profile.cdn_verizon_premium
1azurerm_cdn_endpoint
1jamstack_website
1origin_host_header
1origin.host_name
1primary_web_host
1uniqueaccountname.z6.web.core.windows.net
Stay updated
Get informed about the most interesting MasterBorn news.
Continuous Deployment
The last piece of our infrastructure will be the Azure DevOps pipeline. But before we start with pipeline, we need to create a definition of it and add it to our repository. Below you can find an example of
1azure-pipeline.yaml
Pipeline
1name: My-website-$(Date:yyyyMMdd).$(Rev:r)23trigger:4 branches:5 include:6 - master78pr: none910pool:11 vmImage: 'ubuntu-latest'1213steps:14 - task: NodeTool@015 displayName: 'Install Node.js'16 inputs:17 versionSpec: '12.x'1819 - bash: |20 set -ex21 ./scripts/get-depended-repos.sh22 displayName: 'Checkout depended repositories'2324 - bash: |25 set -ex26 npm ci27 npm run build28 displayName: 'Install & build site'2930 - bash: |31 set -ex32 rm -f ./public/*.map33 rm -f ./public/webpack.stats.json34 displayName: 'Remove vulnerabilities'3536 - bash: |37 set -ex38 az storage blob delete-batch \39 --account-name $(ACCOUNT_NAME) \40 --account-key $(ACCOUNT_KEY_MASTER) \41 --source $(CONTAINER)42 az storage blob upload-batch \43 --account-name $(ACCOUNT_NAME) \44 --account-key $(ACCOUNT_KEY_MASTER) \45 --source ./public/ \46 --destination "https://${ACCOUNT_NAME}.blob.core.windows.net/$(CONTAINER)"47 displayName: 'Deploy to storage'4849 - bash: |50 set -ex5152 # Login as service principal53 az login --service-principal --allow-no-subscriptions -u $(SP_USERNAME) -p $(SP_PASSWORD) --tenant $(TENANT)5455 # Purge CDN56 az cdn endpoint purge \57 --resource-group resource_group_name \58 --name $(CDN_ENDPOINT) \59 --profile-name $(CDN_PROFILE) \60 --content-paths '/*'61 displayName: 'Purge CDN'
This will initialize only when we push it to the master branch because we only want to publish when our code is ready for prime time. So in this deployment there are several steps involved:
-
First we need to install node in latest version 12.x.
-
Second, we need to fetch and extract all depended repos from
file ( described here)1dependencies_repos.csv -
Then dependencies and compile source code to static files.
-
Next, we want to protect from vulnerabilities by removing all
files and webpack statistics.1.map -
Moving onto the next step, we finally can upload our code, but first we want to make sure there is no previous version of the website in the storage account and if so, remove it.
-
Finally we can login as service principal (explain later) and purge the CDN cache so the new version can be published to all POPs.
Service Principal
Sadly before we move forward we need to set up one more thing. To be able to purge our CDN in non-interactive mode we need to have a service principal . A short description taken from the Azure docs reads:
An Azure service principal is an identity created for use with applications, hosted services, and automated tools to access Azure resources. This access is restricted by the roles assigned to the service principal, giving you control over which resources can be accessed and at which level. For security reasons, it’s always recommended to use service principals with automated tools rather than allowing them to log in with a user identity.
Steps to create service principal can be find in this excellent description on stack-overflow.
OK, so finally we can use it! Since we host our project on GitHub, you can sign up to Azure DevOps with it.
Pipeline set up
When you are logged in to your account, you should switch to the pipelines section on your right hand side. Because you don’t have any pipeline yet, there should be button ‘Create Pipeline’ in the middle of the page. Click on it and then pick up ‘GitHub’ as the source of your code. On the next screen you should see a list of your repositories. Pickup the one where you have your pipeline yaml definition. The file should be picked up automatically, review it and before continuing.
Pipeline environment variables
You need to add the variables used during build time. To do that, go under your pipelines list, select the one you have created, and click edit. Now you should be able to click on
1Variables
To make one as a secret variable you need to select checkbox ‘Keep this value secret’:
- ACCOUNT_NAME - This will be , but you can always find this value in portal on storage account page under ‘Settings -> Access keys’1uniqueaccountname
- ACCOUNT_KEY_MASTER (secret) - Again this can be found on the same page where ACCOUNT_NAME is under ‘key1 -> Key’ field.
- CONTAINER - This should be ‘$web’ because this is the default path for the storage account website.
- SP_USERNAME - service principal name set with az ad sp create-for-rbac command
- SP_PASSWORD (secret) - service principal password set with command1az ad sp create-for-rbac
- TENANT (secret) - tenant value output from command1az ad sp create-for-rbac
- CDN_ENDPOINT - This should be 1cdn-my-website
- CDN_PROFILE - This should be 1myjamstackwebsite-verizon-premium
Run it!
When you’re done, then close the variables window and manually ‘Run’ the pipeline. If it’s OK then each time you merge your branch with the master, it’ll deploy a new version on your website.
DNS zone
This is not necessary, but you would probably like use Azure DNS service to link your domain to CDN endpoint containing your website. If you are interested in this then read Azure tutorial with detailed steps.
Generating markdown pages from depended github repos
Before we move into customization project on the frontend, it’s important to mention about
1dependencies_repos.csv
It’s the file that pipeline is using during build process. In each row, there are defined variables used to fetch and extract markdowns files from depended repos, during a gatsby build.
One line include following parts:
1ORGANIZATION;REPO_NAME;COMMIT;SRC_DIR;URL_PATH
Where
- is the github organization name1ORGANIZATION
- is the repository name inside organization1REPO_NAME
- is a specific commit id in repository1COMMIT
- is a path in the repository where MD files are stored. Use / to use the root repository folder1SRC_DIR
- is where you want to have the final URL (1URL_PATHis for front site;1/will end up with1/example)1<website>/example
Customize frontend gatsby project
In this part, we will guide you on how to customize a Ockam website with documentation to fit your needs.
To generate the frontend, we use Gatsby which is build on top of React.js. Gatsby helps us significantly by generating static content based on markdown files.
Requirements
To start working with your own project, please fork Ockam website first, and clone it into your local machine.
1git clone https://github.com/path-to-your-forked-repo
To start your local development, you need to have installed nodejs
Running
Navigate into the site’s directory and install all dependency:
1npm install
and start it up:
1npm run start
The site is now running at http://localhost:8000
File and folder structure
General file structure is describe inside
1README.MD
General layout and theming
There are two major layouts used in projects:
- which is used to generate all website pages1PageLayout.js
- which is used to generate dynamic content from markdown files.1LearnLayout.js
Page layout by default has applied a dark theme, which is a default for this project (
1/src/theme/defaultTheme.js
1/src/theme/lightTheme.js
1themeName
1ThemeProvider
1dark
1light
1<ThemeProvider themeName="dark"></ThemeProvider>
You can always play with colors by changing them inside the theme files (
1defaultTheme.js
1lightTheme.js
1lightTheme
1defaultTheme
Adding/removing pages
In gatsby you can create website pages a few different ways. There are more details about that in gatsby documentation. For website pages, we use a basic approach where all components from
1src/pages
Customizing header menu
One of first thing you may want to change, would be the header menu. In order to do that, go to:
1src/components/Menu/MenuItems.js
1DropdownMenu
1Link
1<Link2 fontSize={LinkFontSize}3 onClick={onClickItem}4 title="About Us"5 padding={{ _: 2, lg: 3 }}6 to="/about"7>8 About Us9</Link>
Customizing docs pages
In our project, all pages generated from markdowns are inside
1/learn
1src/content/learn
Based on your needs, you may want to avoid this additional level
1/learn/*
1markdown
1md
1src/content
1dependencies_repos.csv
After that operation, remember to change the path for assets in your md files.
In case you are still using blog for your purpose, you should have to also change paths of
1/learn/blog
1/blog
- 1src/hooks/useAllBlogPosts.js
- 1src/templates/LearnTemplate.js
You may also want to reset your local server, and clear thecache:
1$ npm run clean2$ npm run start
Setting configuration values
Last thing you have to change is some configuration parameters under
1config.js
If you are going to use features like google algolia, recaptcha, etc, please remember to update ENV variable on your azure pipeline ( described here )
Summary
In this article we have created a JAMstack infrastructure on Azure cloud with the help of Terraform and we set up a Azure pipeline to help us with the continuous deployment.
We configured depended repos to generate pages from related markdown files.
Finally, we have cloned an open source Ockam_webiste and customized the frontend part.
And that’s it folks! Thank you for your time and I hope you have learned something new.
Table of Content
- What is it all about?
- Requirements
- Infrastructure in Azure cloud
- Keep Terraform state remotely
- Storage for website static files
- Content Delivery Network
- Continuous Deployment
- Pipeline
- Service Principal
- Pipeline set up
- Pipeline environment variables
- Run it!
- DNS zone
- Generating markdown pages from depended github repos
- Customize frontend gatsby project
- Requirements
- Running
- File and folder structure
- General layout and theming
- Adding/removing pages
- Customizing header menu
- Customizing docs pages
- Setting configuration values
- Summary
World-class React & Node.js experts
Related articles:

Figma vs Sketch - How choosing one tool saved us 6.8K USD a year
Both tools are top of line so why are people switching from Sketch to Figma? And why did we decide to do so in MasterBorn?

Website vs. Web App: 8 Key Differences
Are websites and web apps really that different? Find the digital strategy that fuels your business growth from sleek simplicity to interactive power.

Art of AI: Will AI art generators displace human creativity?
Can art created by artificial intelligence blend in with real artists’ pieces? Learn the ins and outs of AI art generators and how they fit into our world.